Tuesday, August 19, 2014

Brush Cherry/Eugenia - Incredible progression!

The tree was bough as a nursery grown lollypop tree in October 2011. I bought it for the massive nebari. I did not chop the tree immediately because the top had very nice potential as another bonsai so I air layered the top.

A picture of the mother plant and layered part (Autumn 2012):

I removed the air layer in October 2012. Here is a picture of the air layer part of the tree.


Here is the bottom part just after the air layer was removed:

October 2012:
 Here one can see the wide nebari and the beautiful bark of the species. The red indicates the possible new leader then.
I entered the tree in a competition in August 2013:
http://ofbonsai.org/contest/ryuga-2013/entry-eugenia-myrtifolia-brush-cherry-south-africa


After posting the pics for the competition the tree was cut back heavily to the trunk and thick growth only. The pictures showed a lot of growth but there were not much to work with.
After the cut back the tree budded out everywhere and I let the tree grow out freely to recover from the heavy cut back.
The pics show the tree after I have selected potential new growths. All growths growing downward, directly upward, growths in bends, growths coming from the same bud and growths that were positioned that would not add to the design, were removed.
I felt better about the potential of the tree then because I could picture the final outcome of the tree in my head at that stage.
The growth in the upper part of the crown will have been reduced in the first week of December to preventing them from becoming too thick. The lower growths were left alone until the second week of January before being reduced. The tree would then be defoliated and wired completely.
I was still going for an old tree in the broom style where the branches are styled in the naturalistic branch structure.


 From the last pic I have cut back all growth in the crown to force growth into the lower branches and twigs. I needed to do that to thicken up the branches and the twigs. Luckily I went on holiday so the tree had more than 30 days to grow out. This is how the tree looked somewhere January 2014:
 
I have cut back the lower branches somewhere late January/beginning February. They have thickened up nicely and because they were growing freely they suppressed growth in the crown. I also lowered the apex by cutting it back a bit. At that stage the back of the tree looked nice also.

From the last picture I balanced the growth in the upper half of the tree with the growth in the lower branches. The main purpose was to get some twiggy growth. This is the tree in late March just before I defoliated the tree, the tree defoliated, the tree wired and the branches and twigs styled. (The first three pictures.)
I tried my best to get as much movement possible in the twigs to portray the theme of an old tree.
At that stage I was very happy with the outcome of the tree.
Having only a few weeks left till the final pics I gave the tree as much sun and heat as possible to get the buds going. The tree reacted well.


14 April 2014:
I am very happy with the outcome of the tree. The tree has not disappointed me in what I have planned right from the beginning for it – when finished the tree will portray an old tree with one crown but with pads within the crown flowing into each other as one will found on old natural trees.
From here I am going to let the tree grow out a bit again to the 4th leave stage before cutting it back again. After that I will have enough twiggy growth to fill out the outline of the crown. The crown will also be a little bigger then, but wider than high. With the defoliation in early summer, the leaves will reduce tremendously – getting them at about 3mm wide and 5mm long is possible with the species using the correct technique. The smaller roots of the nebari will fatten over time adding more character to the base. Some carving, like a hollow, may also be in the future of the tree. Over time the front of the tree will probably change – lots of possibilities in its future.
When ready the tree will be planted in a light blue and brown oval pot with a pronounced lip and feet.


The tree today at the beginning of spring(August 2014):
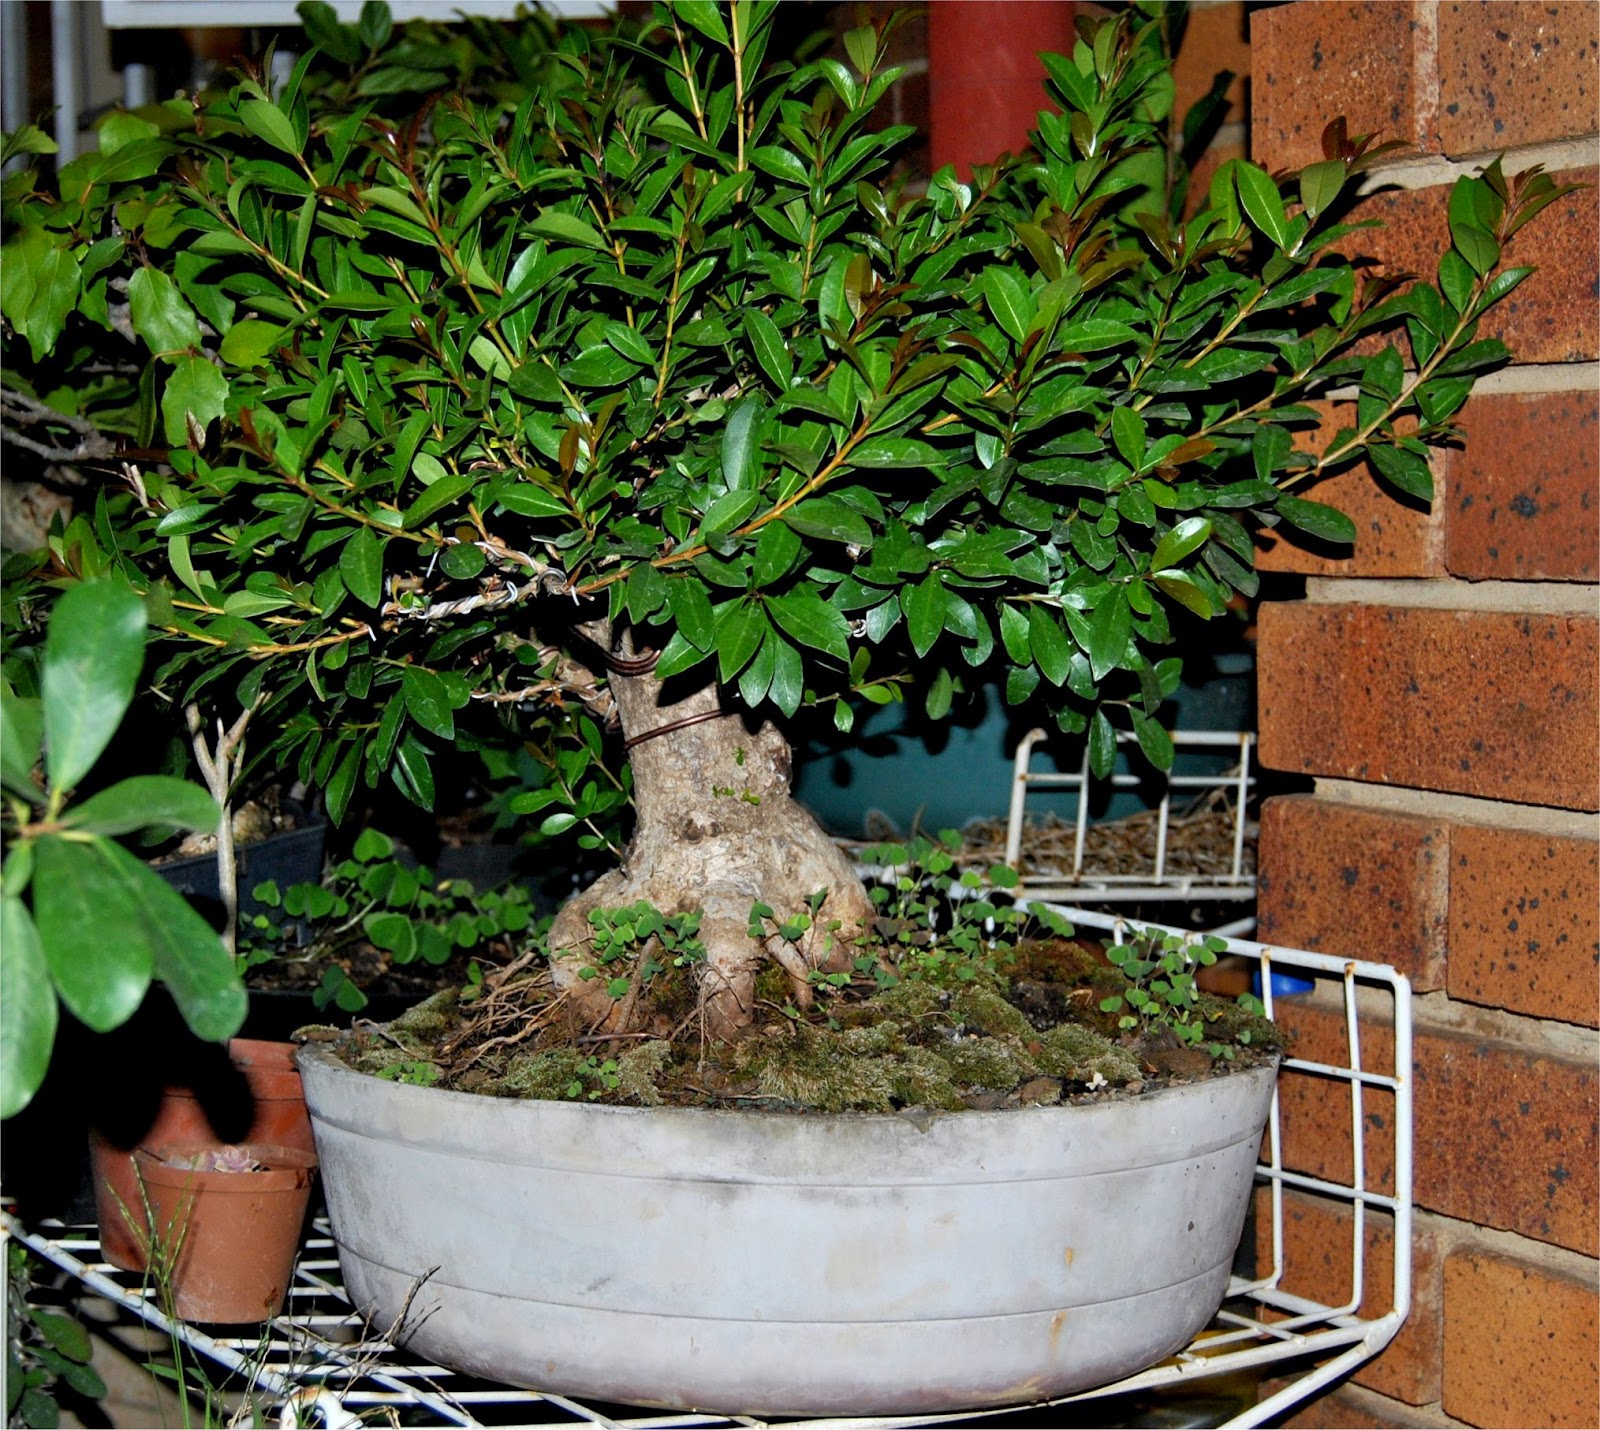


The tree is still growing strong. I am going to fertilize it heavily over the next two weeks and then I will do the cut back to two leaves again.

September 2014:
(Before cut back and defoliation.)

After the cut back and defoliation:


Thursday, July 17, 2014

Holmskioldia sanguinea (Chinese hat plant) - This is going to be a lot of fun!

I was lucky enough to get this species from the school where I am a teacher. We enlarged a lawn and most shrubs were removed. This one is about 50 years old:
 March 2013:
 This is the flowers of the species:
 The leaves - now we can see it is part of the mint family:

Some info on the species:

Named after Theodor Holmskiold, an 18th Danish physician and professor, Chinese hat is native to the Himalayan lowlands and is an erect climbing shrub that bears narrowly trumpet-shaped flowers with crimson petals and orange-red calyces. Its unique flowers are the main interest of this scrambling shrub: each is a narrow, orange-scarlet tube backed by a broad, circular calyx, appearing in dense terminal clusters through fall and winter. The mid-green leaves are oval and slightly serrated. There are also yellow- and bronze-flowered forms.

  PRUNING... This tree is a very rampant grower. Prune weekly back to the first or second node on secondary branches while actively growing Will handle severe top and root pruning.

 TRAINING... Wire for movement in main branches and use clip and grow for secondary branches. Due to its quick growth rate watch for wire scarring.

 WATERING... As any quick grower it likes a lot of water during the summer months.

 LIGHT... Full sun is best. Although can tolerate partial sun.

 INSECT/DISEASE... Watch for Scale, Mites and Aphids.

 FERTILIZE... Careful with the nitrogen, too much will stretch the internodes. Use a balanced fertilizer through the growing season then start adding phosphate late summer for blooms.
 REPOT... Repot every one to two years.

 SEASONAL... Protect below 40 degrees. In your landscape will freeze to the ground and come back, but will need some protection on a sustained freeze. 


The one I have dug in winter(July 2014):


 Time will tell.......but it is going to be a lot of fun!


Wednesday, July 16, 2014

Mulberries - will give them a go!

Mulberries here are kind of a weed, and in the world of bonsai not regarded very high.  They do fruit nicely and the leaves do reduce well, but I never seriously consider growing one into a nice bonsai.

I do have this one for a few years now but did not do much with it except for cutting it back drastic now and again:

July 2014 I decided to give the species another chance. I repotted the tree into a bonsai pot(To give it some status!) and I cut it back hard again:

It will look good in 3-5 years.

Being very positive about the species, I dug up another that was placed on the ground 2 years ago:


Another one dug from the garden(2 years old):


Looking forward doing something to them!


Monday, July 14, 2014

Celtis africana - bridging the big wound.

June 2009:

I can not really remember where I got this material. The biggest problem with it was the big ugly wound low down.

March 2010:
 I have cut back some of the thick branches and is slowly rebuilding the branches. There is a big wound but the cambium is starting to roll over so over time it will be healed. The wound extends just above the lowest branch downward to the left. The branch indicated with the pink line (picture 3) is going to help heal that area (closeup picture 4).


The branches and twiggy growth are coming along nicely  - the wound is still a big problem!


October 2012:
I have used one of the twigs to bridge the wound.


June 2013:
The graft/bridge has fused well.
The tree today:


Un update-July 2015:


Comparing 2014 and now: