Thursday, December 6, 2012

Buxus - Potting up a nursery tree.

I bought 10 of these Buxus trees a few months ago because most of them have very nice nebari and with that very cheap:


The trees were very leggy so I cut them back to the lowest possible branches/twigs with leaves. I used the water hose to remove some top soil because there were very little surface roots and replaced the washed of soil with horse stable compost. The compost on top of the soil:


The trees budded out nicely:

Two weeks ago I started to reduce the height of the root balls of the trees.

I first cut back the tree again to twigs with green leaves and I also sealed all the wounds:


Nice surface roots have formed:


I decided how much of the root ball I wanted to keep and took an old saw and saw of the bottom three quarters of the old root ball:

Saw through, plastic removed and a big root sealed:

I layered the new plant pot with a free draining medium of about 1cm and also 2cm of my normal mix - I need new roots to form lower down because I will have to remove some surface soil later on to expose the nebari.
The tree placed in the pot:
I added some soil to the sides and finished it off with some compost:


It was watered heavily and placed in light shade to recover.


Saturday, November 24, 2012

Air layer-instant Brush Cherry (Eugenia).


I got this tree in the beginning of this year(about February 2012) as a Lollypop tree. I did not care much for the trunk and crown because the 
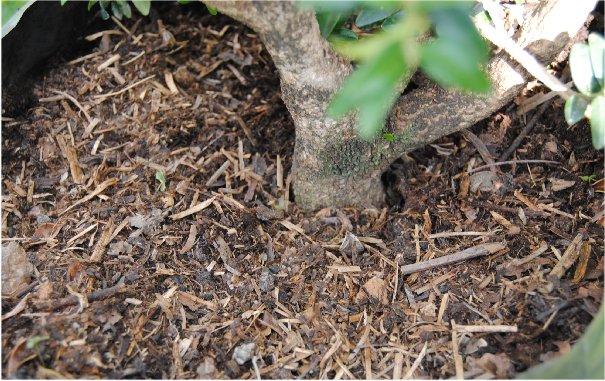
trunk was too straight. I liked it because the tree had a very nice base. When I inspected the crown I did found a trunkline and decided to go for a literati but I realized the tree was going to look a lot like my one of my Privets. I decided to air layer the tree not to waste the crown. I used the pot method with normal soil. I also removed branches to form the trunkline.

The air layer done in Autumn(March/April, I think.):

 A close up with a lighter as size comparison:
To force the layer to form roots quickly pieces of bark were removed on a regular basis. By October I removed the last piece of bark and the tree did not wilt. I removed the layer by using a saw. The tree did not wilt after removing it. Here you can see the screws I screwed into the trunk just below the lower cut to keep the pot upright. There was a hole cut into the bottom of the pot and the one side slit so the pot can be wrapped around the trunk. It was fastened with cable ties to keep everything together.

This is the biggest advantage of using the pot method. After removal the air layered part can be kept in the pot without any disturbance. Normal soil can be used so you dont get that entangled roots as with sphagnum.


 The tree removed from the pot- nice roots has formed:

Potted up into a plastic training pot:

Cleaned up and wired:

The whole process took me only seven months - can't wait to start working on the bottom trunk!

 I almost lost the tree after an overfeeding and poisoning the tree. I struggled for weeks to keep the tree green because I knew I had lost most of the root system. As a last resort I enclosed the pot with aluminum foil to prevent any water loss and to keep out water also from the soil. The foil was also to keep the tree in the pot because I turned the tree upside down and submersed the area of the tree above the soil level for 30 minutes every second day. Don't know if it helped but the tree seemed to respond well to this treatment. The tree beginning January after the treatment:


 From there the tree has recovered well and it seems I have pulled it through. The tree today(March 2013):

 I am going to let it grow wild so that it can grow a strong root system.

Very glad it did survive!

February 2014:

The tree has recovered well and I have planted it in a little bigger pot:

 After removing some unwanted growth and wires:
Slightly from above:

I have not yet decided on the final placement of the branches. I will let it grow freely for another two weeks before I cut back the twigs.

Will update then.


Thursday, November 8, 2012

Acacia karroo - leaf stalks as twigs.

Acacia karroo is another tree in this group lending it self nice to the art of bonsai. The big difference for me is the tuft of leaves this tree make before a new shoot/inter node is formed. This tuft of two to four leaves will definitely help making a nice open umbrella or flat crown. The cluster of leaves on a new shoot:


It may be grown from seed which should be soaked in hot water and left overnight. You will see if this has been effective as the seed will swell up. Sow the following morning. Seedling trays with seedling mix can be used, or the seeds could be sown directly into black bags. Cover lightly with sand and do not allow to dry out. Germination usually takes 3 - 12 days. The seedling will transplant well in spite of the long tap root. Wait until they unfurl their second leaves before transplanting.

 In cold and dry areas the tree will be deciduous.

The sweet thorn is very adaptable to soil types and is frost and drought hardy. However, for best performance, water well and deeply (shallow, frequent sprinklings only encourage shallow root growth) until established. Plant with plenty of compost, bonemeal or superphosphates (commercial tree tablets also work well).

The growth rate is fast, up to 1m per year. The growth on this bonsai was obtained in two months time:

Progression:
November 2009


August 2012


 September 2011


November 2012  before cut back.


 November 2012 after cut back - important to cut back again to last bud on twig.


The tree will be defoliated as soon as the new buds swell. From there it will be pinched regularly. In August 2013 it will be repotted in a bonsai pot.


More or less the vision I have for this tree.
The latest pics(October 2013):


Friday, October 12, 2012

Experimental root over rock/root clinging to rock technique.

When planting bigger rocks with Ficus using the normal wrap method watering became a problem ...and burying such a large rock is out of the question.

I am experimenting with making a removable (the roots can be inspected without too much disturbance) covering for the rock with a watering area. You will also notice that I am doing away with the normal "rock in a bonsai pot" by giving the rock it's own base- almost " a rock on slate".

More or less what I envisage for this planting:


Here is the technique:

STEP ONE.


The rock is set in a product called ROCKSET. It hardens very quickly and it is really as hard as rock. Because it is quite heavy it will keep the big rock upright. To make it look like natural rock it would be possible to sculpt it - will experiment on this later on. The base can be fastened to a pot by leaving some holes into the Rockset and wiring the base onto the bonsai pot. For this planting I am not going to put the rock into a bonsai pot. Soil will be slanted to the rim of the base. Rockset can be colored by using oxides.

STEP TWO.


Using old newspapers and boiling water make a paper mache. This will be used to line the rock The lining must be about 1cm thick. At the base the lining will slant from thick to very thin to the rim of the base.

STEP THREE.


Lining the  rock. Crevices are filled thickly and outcrops lightly. This is important because this will force the roots to grow as close to the rock as possible. The backside is not lined because Ficus in nature normally grows only on the one side of a rock cliff. The lining finished:


Notice that the top part is not covered. Ficus never grow over the very tip of a rock but rather on a "cliff" lower down. The "lip" of the covering can also be formed by the newspaper mache- this will ensure that watering your root over rock planting will be simplified.

The mache on the side must be very thin otherwise the mould will not seal of nicely there:


STEP FOUR.


The mache is now covered with a product called PU-FOAM (Spray polyurethane foam, commonly referred to as SPF is a spray-applied insulating foam plastic that is installed as a liquid and then expands many times its original size.)

My first attempt was an "overkill" because I tried to cover the whole area in one go. It would be better to do it in layers starting from the bottom letting the first layer dry before applying the next. Laying the rock down in sand overcome this problem:


One can of the foam will be enough to cover 5 to 6 rocks depending on the size of the rocks. To prevent the foam clinging to the sides of the rock or the base, it can be wrapped with cling plastic before applying the foam.

When dry the cover can be lifted from the rock and refined by using a sharp blade. The outside must be painted by an oil based paint to protect it from the sun.

STEP FIVE.

Remove the newspaper and do your rock planting as usual. Here is a pic of me and Roberto struggling to set all the roots into the little crevices:


Luckily the roots were long enough to reach the base of the rock.

When finished fasten the covering to the rock by using cable ties. When done pour in your DRY soil medium. The rock and covering can be tapped lightly for the soil to settle in all the crevices. Water heavily. Watering the dry soil for the first time may take a while.

Here is the finished planting two weeks later:


Notice the watering area:


I have added some dead moss to encourage  more roots.

The back side:


Cable ties and off cut foam pieces were used to force the current roots into the crevices.

I will open the planting end February 2013 to see what is going on. I expect not to see a lot of top growth but a lot of root growth- it's the habit of Ficus natalensis to grow a lot into it's roots in the beginning.

Will update then.

To do the normal root over rock the whole rock can be covered and after it has dried it can be cut in two halves.

The tree end December 2012:


It has grown very well and I am very curious to see the roots!

March 2013:


I should have opened the tree because I forgot I used a cable tie to keep the three trunks together to hold them together for the planting. The tree has grown so fast that it's trunk started to grow over the cable tie. It left a scar but it will heal over time. The three trunks have also fused and I got some roots going where the damage was done - not all is lost.

There are a lot of roots coming out of the bottom of the planting- the only other worry I have is that there is a big possibility that some roots may have grown into the styrofoam. With Ficus roots everything is possible. It is Autumn here so I wll have to till early summer to open the planting.

Can't wait!

The waiting is over!

I could have wait for another month but our weather is warming up and most of my Ficus started  growing again.

This is the tree today(August 2013) - 11 months later:


I got tremendous growth on the tree in comparison with my other Ficus the same age. I think that the roots was kept warm by the foam and it added to the high growth rate. The cover came loose quite easily - only a few roots grew into the covering. Here is the first view after removing the cover:


I got a lot of fibrous roots - I was a little bit worried that I would get only or two of the original roots fattened up. The grey you see in the picture is leftover newspaper that I used to line the rock to prevent the foam from sticking to the rock - it disintegrated in total. Some of the organics in the soil mix disintegrated also - most of the roots that formed looked more like air roots than roots growing in soil.

Here is the roots after I washed off the growing medium:

In general I am very happy with the roots that have formed. After rearranging some roots I fastened them again using cable ties and foam:
I also cut back the tree a bit. I replaced the cover:
I did not fill up the cavity after covering it up - I will give the roots a day for any damaged roots to seal off.

The tree will be left alone to grow freely again - I will open it up in January to prevent the cable ties to cut into any of the roots.

In general I am very happy with the outcome of the experiment.

I am removing the cover bit by bit to harden off the roots:

The tree February 2014:


The three roots going straight down were not part of the design. They will either be removed or rearranged.

The tree will be left like this until late spring 2014.

5 December 2015:


I have not worked on the tree for over a year now.

Lots of development in the roots but not much to the top. The cuttings have all fused now into one trunk. The variety I am using is quite amazing when it comes to fusing and root over rock.

I was planted in a home made Rockset pot but the pot could not handle the weight of the rock and the roots of the Ficus - so it is back into a plastic basin again.

I need to do some branch selection and rerouting some roots soon.