Saturday, March 9, 2013

Grewia occidentalis

(The above tree showing the beautiful flowers  belongs to James Campbell as shown in the  Campbelltown Bonsai's Annual Show in November 2012: Picture by Leonarda: http://www.ausbonsai.com.au/forum/viewtopic.php?f=25&t=13531&p=142579&hilit=grewia#p142572)

The same tree today:
 

Common Name:
Bow-wood, Button-wood, Lavender Star Flower (English) Cross-berry (English) Mumaka (Shona) Musosobiana (Shona) Umsosobiyane (Ndebele) Kruisbessie (Afrikaans)

Name from: Four lobed fruiting capsule.

Habit: Evergreen shrub, much-branched- may loose leaves in very dry or cold periods.

Height: May grow up to 5 meters but mostly 3-4 meters.

Leaves: dull dark-green, serrated, bluntly pointed, 20 -60mm long.


Flower: star-shaped, pinkish - mauve, with 5 coloured petals and 5 similarly-coloured sepals which grow between them. A cluster of yellow stamens stands out from the centre. August - March.


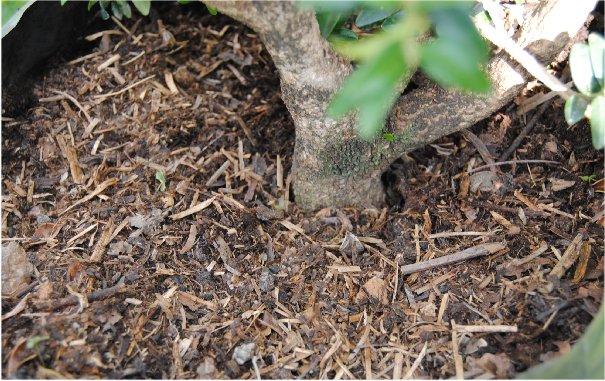
Wood: Gray smooth fibrous thick bark..


Fruit: The fruit looks like a cross because there are four round seeds in the capsule.

Habitat: The natural distribution of the Grewia occidentalis ranges from the Western Cape up to Zimbabwe and Mozambique. The tree grows in the winter rainfall as well as the summer rainfall areas of Southern Africa.  In the Northwest Province of South Africa they grow with Buddleja, Olive, Red Ivory, Celtis and Acacia on the foot of the Magaliesberg mountain. Here is pic of the area you can found them - notice the Buddleja and Olives in the background:
The same area but here the authorities bulldozed all the potential yamadori to clear the land for the powerlines - what a shame!


Cultivation: Grows easily from fresh seed. Likes good soil and plenty of moisture, can stand full sun or part shade, but needs protection from heavy frost. Warm water treatment of seeds may lead to better germination.

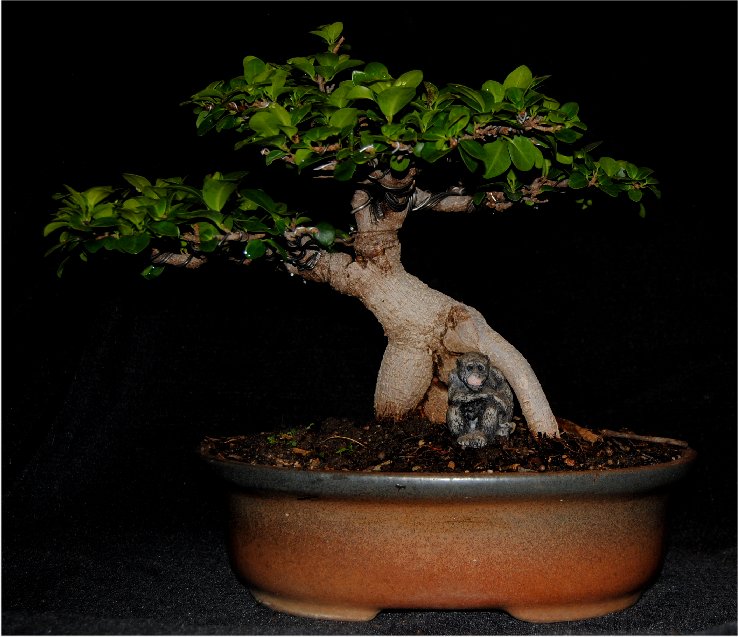
GREWIA OCCIDENTALIS AS BONSAI

The following shows a progression series of a beautiful root over rock Grewia from Steve Reeve from Australia.
The tree in 2005:
 2010:


The amazing tree today:


(Will complete this post soon.)


Friday, February 22, 2013

Ginseng (Pot Belly) Ficus.


This is the typical form if of a Ginseng or Pot Belly Ficus:

This Ficus is a variety of Ficus microcarpa which have the characteristic of having thicker roots than the normal Ficus microcarpa.

All over the world this characteristic is used to grow the thick roots even fatter by using different horticultural techniques. One technique that is used is to reduce the roots to three to five roots- the more roots there are on an average size trunk the thinner the roots will be.

This characteristic can also be find on other Ficus species. Here is a Ficus natalensis that was removed from the rotten core of another tree:

It seems that intervals of drought and watering encourage this kind of roots forming - in these conditions the tree relies heavily on the stored water and energy in the "tubers".

Most of the trees in the bonsai trade have another variety of Ficus microcarpa grafted onto the roots. The other variety has greener, shinier and rounder leaves and the nodes are much shorter between the leaves as with the original species.

Here is the grafted growth on the left and the original growth of the tubers on the right:
Notice also that the tubers leaves are more prone to the common leaf distortion on Cuban-laurel caused by a little black thrips from southeast Asia. The leaf responds to the sucking type feeding of this thrips by
folding upward along the midvein. This results in a misshapen leafroll that resembles a pea pod. Here the offspring are raised in the safety of the folded up leaf.
 

The exposed fat roots are frowned upon by the bonsai community because the fat exposed roots look very unnatural. If you like the roots the crown can be shaped and it becomes a nice oddity - at bonsai shows it is usually the tree that get the most remarks........although not always very positive remarks!

Here is one of mine I have styled:
(Side A and B, from the top and defoliated.)


Although it is true that the Ginseng Ficus, as is, does not make a very convincing bonsai, it is not true that the material can not be used to grow a bonsai.

Sometimes, by selecting the right tubers, you can have a convincing trunk:

The trunk in  beginning 2010:

Here the grafts and chop are clearly visible.

Here is the trunk today:
Notice where the third tuber was removed:

The graft is also very noticeable in this picture because it tends to form meristematic  tissue. This growth will have to be carved away or hidden by the canopy. With this experiment the crown will be shaped next summer.

Here is a pic of the removed root bearing the original species's leaves:
 
Notice the new thinner roots forming at ground level as well as the longer nodes than the grafted species. You will also note a aerial root that has fused to the old root. The new trunk will be chopped next summer to develop the tree into a semi-formal or a broom.

The fat roots can be air layered:
(Credit to Dario from Ausbonsai:  http://www.ausbonsai.com.au/forum/viewtopic.php?f=133&t=14337&hilit=ficus)

Here is the tree before with the area mark where the layer will be done:

The bark and cambium removed:
Potted up:

Removed from the pot:

The old fat roots below the layer rotted away:
The rotted area were cut away and the edge smoothed and some roots removed:
Potted up again:


Will post information on culture and other stuff regarding this variety soon


Sunday, February 3, 2013

Making lightweight rocks or mountains.

You first get the picture of your final setting in your head. In this case it is going to be one or two trees in the foreground with a far view mountain with sloping sides and some cliffs. There will be a lot of little pockets created in the mountain where moss and far view trees can be planted.

You then select a flat surface and cover it with newspapers. You can outline the slab with a pencil.

You then take a product called PU-FOAM (Spray polyurethane foam, commonly referred to as SPF is a spray-applied insulating foam plastic that is installed as a liquid and then expands many times its original size.)and do the first layer covering the newspaper. When the first layer has settled you add the second layer keeping in mind the depth of soil your bigger tree is going to need. When this second layer has dried out a bit you add the third layer. In my slab the third, fourth and fifth layer cover only the mountain area. Repeat until you get the desired height of the mountain area. Give the foam a light spray of water before adding the next layer.

When it is dry the backside of my mountain looked something(did not take a pic at that stage of this one) like this:
I then took a knife and carved the mountain area roughly into the shape I needed it to be and did the refinement with my Dremel tool:

Now you can clearly see the area where the bigger tree/s is going to be planted. The little pockets for the moss was carved out also.

I then turned it around and prepared the underside of the slab for the Rockset I am going to use to make a strong base. The foam was carved away leaving only a rim to keep the Rockset inside. If your bottom is not 100% level the rim can be build up by using Polyfilla. If there are any holes in the foam cover them with Polyfilla. if you don't do it the Rockset will leak through because the consistency of the Rockset mixed with water is almost like cream. I placed a few pots, covered with aluminum on the prepared surface where the drainage holes would be. The slab is about 6mm thick:

The bottom with some drainage holes pots removed:

I then let it dry and removed the rim that remained. I then turned it upright again placing the slab on a soft level area because the slab is not strengthened by the topside yet. I then did the refinement carving making sure some of the bigger pockets will also drain into the "pot" area. I then took Rockset again and painted on a few layers:

Here is the process 50% completed:


The foil is to prevent the Rockset to sticking to the rubber surface I placed it on and to catch up the Rockset running down. This rim forming in this foil area will strengthen the slab.

Here is a close up where the unpainted inside of the pockets are visible:

I repeated the process of painting the slab a few times until everything was covered. I believe the Rockset layer will be about 3mm thick.

I removed the foil and colored the mountain with oxide. I then sealed it with sealer looking like woodglue that would also strengthen the mountain. At this stage the mountain looks a little bit too dark but most of the dark areas are going to be planted with smaller trees, plants and moss. If necessary I could lighten it again using the sealant and oxide.

 The mountain:

If this were rock you would have a difficult time picking it up. This one can be carried with one hand.

Will post a pic of the planting when it is finished.

Another mountain/outcrop I made:
 Front:

 Back:

Top:

I am thinking of planting a bigger, but not too high tree on this one. The right hand side will show little moss but the left hand side will show a lot of greens.


Saturday, January 12, 2013

Pierneef style bonsai.

I am going to try and define the style here a little bit more as described in Charles Ceronio's book, Bonsai styles of the world.

I am going to define the style at the end of my observation and would appreciate any help with the interpretation of my observations. Thanks already to the guys from SA Bonsai Forum for their help this far.

There is a general misconception that Pierneef painted only Acacia trees - a lot of the trees seen in his paintings are not Acacia trees. Species he also painted were Baobab (Adansonia digitata), Sheppard tree (Boschia albitrunca), Bergkaree’ (Rhus leptodictya) with its characteristically bent branches, Boekenhout’ (Faurea saligna), Bushwillow (Combretum species) and the Tree wisteria (Bolusanthus speciosus).


"Pierneef would examine a tree so minutely that he knew it as well as a carpenter knows the grain and texture of his wood. His sketchpads were filled with careful drawings of the flat-topped acacias, majestic camelthorns, the angular shapes of the leadwoods, the wild seringas with their delicate crowns of shiny leaves and the baobabs. Each sketch captured the structure and essence of the tree sketched."

" Pierneef was an impressionist, if we want to figure out the Pierneef style, we have to look at his paintings, most established artists do not take a landscape with trees and just paint the trees and the landscape exactly as it is, that wouldn't be art at all, but just a copy of reality, with little to no artistic creativity thrown in...
The answer to the Pierneef style is in the paintings, artists work with dimensions, so the tree's dimensions will be in the paintings, there will be some variation in it, but then we must ask the question of which tree in which painting did Charles Ceronio have in mind when he developed the Pierneef style for bonsai?"

(Shiroherman)

The Pierneef style are defined by the open umbrella shape. It could be a one crown tree or a tree with pads shaped in the open umbrella, groups of tree with an overall open umbrella shape outline etc.

I started by studying one of his paintings of Acacia trees:

I overlayed the trunk, branches and twigs with lines to see if I can find any patterns:


When looking at other paintings where he painted taller trees it seems that the proportions A, B,C and D proportions plays an important role.

Next I took a tree from nature that seems to fit the proportions and did a comparison:


The proportions and angles seems to be almost the same. I virted the proportions and angles on a view of his paintings and in general the follow the same patterns.

Defining the style:

The angle and length of the trunk before the first interruption:
The trunk can be any length and at any angle.

From the first interruption of the trunkline:
In general the trunk splits into two secondary trunks before the secondary trunks splits into 5 tertiary trunks. The tertiary trunks splits into many twiggy growth ending with the canopy. Where splits occur 90 degrees angles are quite common.  Only few other angles are used and are repeated regularly. Front the front of the tree branches could be 90 degrees vertical or horizontal. From the first interruption to the twiggy growth the bends seems to get  progressively more defined.

The canopy
The width of the canopy seems to be twice the height of the area from the first interruption of the trunk to the height of the tree. In most of his paintings individual canopies are not much thicker than the trunk where the trunk meets the soil.

Taper:
In general taper of the trunk to branches to twiggy growth is very gentle. Massive basal flare is not visible in any of his paintings. A nebari (exposed roots meeting the trunk) in general is not visible in his paintings.

Deadwood:
Deadwood branches is quite common in Pierneef's paintings.

Groupings:
When painting groupings notice also the outline of the grouping still shows the very flat open umbrella:

(Please note that the above is a personal interpretation of the style and not to set a standard for the style.)

 I don't have a true Pierneef style bonsai so I am going to train this one as my first attemp:


Will update in winter.


Thursday, December 6, 2012

Buxus - Potting up a nursery tree.

I bought 10 of these Buxus trees a few months ago because most of them have very nice nebari and with that very cheap:


The trees were very leggy so I cut them back to the lowest possible branches/twigs with leaves. I used the water hose to remove some top soil because there were very little surface roots and replaced the washed of soil with horse stable compost. The compost on top of the soil:


The trees budded out nicely:

Two weeks ago I started to reduce the height of the root balls of the trees.

I first cut back the tree again to twigs with green leaves and I also sealed all the wounds:


Nice surface roots have formed:


I decided how much of the root ball I wanted to keep and took an old saw and saw of the bottom three quarters of the old root ball:

Saw through, plastic removed and a big root sealed:

I layered the new plant pot with a free draining medium of about 1cm and also 2cm of my normal mix - I need new roots to form lower down because I will have to remove some surface soil later on to expose the nebari.
The tree placed in the pot:
I added some soil to the sides and finished it off with some compost:


It was watered heavily and placed in light shade to recover.